Wednesday, February 25, 2015

Clam Chowda

So this will be my final post for the day... it's been awhile and I am trying to catch up from some of the amazing meals we have cooked in the last few weeks. Another chowder recipe that was simply divine. Obviously some of the best corn chowders I've eaten have been while I was in New York. I have to say for a lightened up version, this is very tasty. I was apprehensive in using "canned" clams, but they were very good, shocking I know. Maybe it's because I bought them at Whole Foods and they were sustainable? Perhaps that is the reason, yeah probably.

Oh and then there's the bacon... yeah bacon. ..and crisp celery and... creamy potatoes, onions...alright alright here's what's really in it and how I made it...

Clam Chowda       
Serves 6
Clam Chowda
ingredients
• 5 strips thin bacon
• 1 small onion, diced
• 3-4 ribs celery, diced
• 1 tbsp flour
• 10 oz can clams, drained but juices reserved
• 2 (8 oz) bottles natural clam juice (I used Bar Harbor)
• 1 cup milk
• 1 1/2 cups diced potatoes (skin on)
• 2 branches fresh thyme
• Kosher Salt & Freshly Cracked Black Pepper
Optional: Saltines for serving

directions
1. Cook the bacon in a dutch oven over medium heat until crispy. Remove and set aside on a paper towel lined plate. Once cooled, crumble into bite size pieces.

2. Add the onions and celery to the bacon fat and cook for about 5 minutes, stirring occasionally. Stir in flour and cook for 1 minute, stirring. Pour in the reserved juices from the clams, bottled clam juice and the milk. Stir consistently to ensure the flour is evenly incorporated and to prevent any lumps.

3. Bring to a gentle boil, reduce heat to a simmer and add the potatoes and thyme. Season with S&P to taste. Just before serving add the clams and simmer long enough to heat them through. Garnish each serving with some reserved bacon.

Enjoy!

This recipe was adapted from Cook This Not That.

Beef & Kale Stir Fry

I don't have a wok, but whipped this meal up in a regular old non stick skillet, that I've had forever that my mom gave me. It's kinda precious to me and kinda falling apart, but I can't seem to part with it. This skillet provided the perfect vessel for working up an amazing stir fry dish. The trick to ending up with perfect steak, I think, is to make sure you slice the steak very thin (thanks babe- you did a great job!). I also decided to create an even layer with the meat in the pan so that every single piece had it's own spot to sear up on both sides. It worked fantastically and I don't think we talked a whole lot while we both gobbled up our food.

I added fresh bean sprouts, why you ask? Because I love eating them and whenever I can find a good place to throw them in... well, it happens! Oh and not the canned ones... the fresh ones please! This was such a simple dish to throw together and you can easily sub out the veggies or the meat for those that you may find more desirable. Check it out...

Beef & Kale Stir Fry       
Serves 2-3
Beef & Kale Stir Fry

ingredients
• 1/2 lb flank steak, thinly sliced
• 3/4 tsp cornstarch
• 2 tsp vegetable oil
• 1/2 onion, sliced
• 2 cloves garlic, minced
• 1/4 tsp crushed red pepper flakes
• 3 1/2 cups fresh kale, stemmed and coarsely chopped
• 1/8 tsp sugar
• 1 tbsp oyster sauce
• 1/2 Tbsp low sodium soy sauce
• 4 oz sliced water chestnuts
• 1 cup fresh bean sprouts
• Kosher Salt & Freshly Cracked Black Pepper
Optional: Cooked rice
directions
1. In a bowl, toss the steak with the cornstarch and 1/8 tsp salt.

2. In a large deep skillet (or wok), heat 1 tsp oil over high heat. Add the steak to the skillet and cook until browned. Note: I had one even layer of steak in my skillet so that each piece could brown and get crusty at the edges! Stir in the onion, garlic and red pepper; cook 30 seconds. Transfer to a plate. Reduce heat, add 1 tsp oil, kale, sugar and 1/8 tsp salt and cook until the kale wilts. Add 1/4 cup water; simmer for 5 minutes. Stir in the oyster sauce, soy sauce, water chestnuts, bean sprouts and steak. Cook until warmed through.

Enjoy!

This recipe was adapted from Everyday Magazine.

Texas Corn Chowda

I am a member of my local food co-op - Farmers Market Baskets. I pick up a weekly basket for $10 and it's loaded with yummy veggies. They also have a market that you can shop from while you are there as well and you can't beat the quality and the prices. I just love it!

Anyway, they always have weekly recipes/ideas to use for the items in your basket and this was one of them. Well, it was to die for, creamy and flavorful! It is a must make chowder, it's that tasty. There really is nothing like using corn fresh off the cobb but if you can't get it, frozen corn will work in a pinch. I used fresh green chiles and they added a nice authentic spicy mexican flare to the chowder as well. And...warmed up tortillas are this chowders best friend, so don't forget those!

Texas Corn Chowda       
Serves 4

ingredients
• 1 onion, diced
• 3 Tbsp Butter
• 3 Tbsp Flour
• 2 cup diced potato
• 1 cup water
• 3 cubes chicken bouillon
• 3 cups fresh corn cut off the cobb
• 1 can green chilies (or 2 fresh chiles, roasted, peeled & chopped)
• 2 cups milk
• 2 cloves garlic, minced
• Dash of paprika
• Kosher Salt & Freshly Cracked Black Pepper
• 1/4 cup Cilantro, chopped
Corn or Flour tortillas for serving

directions
1. In a dutch oven, heat butter over medium heat and add onion. Cook for 3-4 minutes until softened. Stir in flour and cook for 1 minute, stirring constantly. Add the potato, water & bouillon... bring to a boil. Reduce heat, cover and simmer for 10 minutes until potatoes are cooked through and tender.

2. Add the corn, jalapeno/chiles, milk, paprika and S&P to taste. Cover and simmer for 10-15 minutes. Taste and adjust seasonings if necessary. Turn off heat and stir in cilantro.

Serve with warm corn or flour tortillas.

Enjoy!

This recipe was adapted from Christina @ FMB

Orecchiette with Broccoli, Asparagus & Spinach

I doctored up the original recipe for this pasta dish by just adding various veggies and less pasta. Orecchiette are these pasta noodles that are shaped kinda like little ears and I find them to be fun to eat! The sauce was just a little bit of wine and the pasta cooking water - simple ingredients and big flavors to report here. The recipe made a lot so I would suggest perhaps cutting it in half and serving with a salad. Blanching the veggies beforehand ensures that you don't have to cook the veggies long in the sauce so the meal came together in 30 minutes or less. Here is how I made it...

Orecchiette with Broccoli, Asparagus & Spinach       
Serves 6
Orecchiette with Broccoli, Asparagus & Spinach

ingredients
• 2 heads broccoli, chopped into bite-size florets
• 1/2 lb asparagus, woody ends removed and chopped into 1" pieces
• 5 oz fresh spinach, washed and drained
• 1/4 cup EVOO
• 1 fresno (red chile pepper), seeded and finely chopped (you can also just use crushed red pepper flakes to taste)
• 6 cloves garlic, minced
• 1/2 cup dry white wine
• 3/4 lb orecchiette pasta
• Kosher Salt & Freshly Cracked Black Pepper
Shredded Parmesan for serving

directions
1. Bring a large pot of salted water to a boil. Add the broccoli and asparagus and cook for 1 minute, remove with a slotted spoon and submerge the veggies in a bowl full of ice and cold water. Let cool for 5 minutes, drain and set aside.

2. Bring the pot of water back up to a boil. Cook the pasta according to the package instructions. Reserve 1 cup of the cooking water before draining. Drain and set aside.

3. While the pasta is cooking; in a large deep skillet, heat the EVOO over medium. Add the chile pepper and garlic and cook for 1 minute. Add the broccoli, asparagus and season with S&P. Add the wine and stir until evaporated, about 4 minutes. Reduce heat to low and add spinach tossing until spinach is wilted. Add the pasta to the pot of veggies along with some pasta water. Stir until well combined.

Serve in shallow bowls with shredded Parmesan over each serving.

Enjoy!

This recipe was adapted from Everyday Magazine.

Badass Bean Dip, Seriously

I have been eyeing the Thug Kitchen cookbook and hope to purchase it soon enough but in the meantime I found this recipe on their blog and it was freakin' delicious! If you haven't heard of them, well they have foul mouths and great recipes and I love them for it. Q and I are definitely not vegetarians or vegans, but we try to incorporate meatless meals here and there, mostly here lately. So, I made this to go along with some stuffed green chiles we had one night and we both loved it.

It's so versatile, you can make burritos with it, nachos and load it up with some veggies, or cheese. Yeah.... we do love cheese. So anyway, here is how you make it, this time I didn't change the recipe a bit. You can also find the hilarious version on their website here:  BADASS BEAN DIP.


Badass Bean Dip       
Serves 4-6
Badass Bean Dip
 
ingredients
Enchilada Sauce
•  1 cup vegetable broth (low sodium)
• 2 Tbsp tomato paste
• 1 1/4 tsp chili powder
• 1 tsp ground cumin
• 3/4 tsp dried oregano
• 2 cloves garlic, minced
• 1 tsp soy sauce (low sodium)
• 1 1/2 tsp fresh lime juice

Bean Dip
• 1 tsp EVOO, plus 2 tsp
• 1/2 onion, diced
• 1 jalapeno, seeded & minced
• pinch of salt
• 1/4 tsp ground cumin
• 2 cans (15 oz each) pinto beans, rinsed and drained
• 1/2 cup vegetable broth

directions
1. Make the enchilada sauce:  Combine everything except the lime juice into a medium saucepan and crank the heat up to medium. Bring to a boil, reduce heat and simmer for about 10-15 minutes, whisking occasionally. Once thickened slightly, add the lime juice, stir and remove from heat. Set aside.

2. Make the dip:  Heat 1 tsp EVOO in a pan over medium heat. Add onion and saute until browned well about 5 minutes, then add the jalapeno and cook another 2-3 minutes. Remove from heat and set aside.

3. Pour 1 can beans in a food processor (or blender) and the other can in a medium-ish size bowl. Mash the beans (with a fork or potato masher) until almost all broken up. In the food processor add the broth, remaining oil, cumin, salt, 1/3 cup of the enchilada sauce, half the onion and jalapeno mixture and puree until smooth. Pour into the bowl with the mashed beans and add the remaining onion/jalapeno mixture, then stir until combined well.

4. Preheat the oven to 350ยบ. Pour the bean dip in an oven safe bowl and top with some more sauce. Bake about 10 minutes until warmed through.
Enjoy!

This recipe was adapted from Thug Kitchen.

Friday, January 9, 2015

Spicy Italian Chicken Sausage Breakfast Casserole

I got the idea to make this version of a breakfast casserole after I made this one during the holidays:  Turkey Sausage Breakfast Casserole. It was just so good I wanted to make it with different flavors. It is certainly a nice change to have this on hand versus the go to cereal for us for breakfast. We just warmed some up in a bowl and rolled it up in warm spinach flavored tortillas to go.

I added a few things I just had on hand already and it really came out tasty. If you wanted it even spicier you can just add crushed red pepper flakes, chopped jalapenos or hot sauce. Or you can go the opposite way and get mild sausage versus the spicy. Either way I think it turned out great! I might try it meatless next and use some beans in place of the meat.

Spicy Chicken Sausage Breakfast Casserole       
Serves 6-8
Spicy Chicken Sausage Breakfast Casserole
ingredients
• 1 lb Spicy Italian chicken sausage, casings removed
• 16-18 oz frozen hash browns (I just used half of a large bag)
• 8 large egg whites, lightly beaten
• 4 green onions, finely chopped
• 3 cloves garlic minced
• 1/2 cup milk
• 4 oz shredded cheddar cheese
• 4 oz sliced black olives
• 1 red bell pepper, seeded and chopped
• Kosher Salt & Freshly Cracked Black Pepper
directions
1. Preheat the oven to 350ยบ. Brown sausage in a cast iron skillet over medium heat until browned and cooked through. Remove and set aside on a plate. Add the hash browns to the same skillet (add a lil bit of oil if the pan seems to dry), salt, pepper & garlic. Cook until potatoes are slightly browned. Remove from heat.

2. In a large bowl, mix all the ingredients together until well blended. Pour into a buttered 9 x 13 baking dish.

3. Bake for 1 hour, let cool slightly and serve.

Enjoy!

This recipe was adapted from Allrecipes.

Spaghetti Squash Alfredo

I was shopping at our local food Co-op... (Farmers Market Baskets) last week and one of the volunteers was talking up this recipe while I was there. I thought, dang that sounds good! So I decided to pick up the recipe card and a spaghetti squash to make it! I pretty much stuck to everything the way it was and both of us were so excited to eat this yummy dish. It came out uh-mazing and now I want to make it again and again and again, well maybe not that many agains. Ha! It is much lighter take on the traditional fettuccine alfredo and I really didn't miss the noodles in it either.

Anyway, here is how you make it...

Spaghetti Squash Alfredo       
Serves 2
Spaghetti Squash Alfredo
ingredients
• 1 medium sized spaghetti squash
• 1 Tbsp butter
• 3 cloves garlic, minced
• 2 tbsp flour
• 1 cup milk
• 1 Tbsp cream cheese
• 1 cup Parmesan cheese, plus 2 Tbsp for topping
• 1/4 tsp kosher salt
• 1/8 tsp freshly cracked black pepper
• Crushed red pepper flakes and chopped fresh parsley 

directions
1. Preheat the oven to 350ยบ. Line a baking sheet with foil and spray with nonstick spray. Cut the squash in half lengthwise. Remove the seeds (scrape them with a spoon). Brush on some EVOO and Sprinkle with S&P both inside and outside the squash. Place face down on the baking sheet. Bake for 1 hour until tender.

2. Make the sauce:  melt butter in small pan over medium-low heat. Add garlic and cook for 1 minute until fragrant. Whisk in the flour and cook for another minute until golden brown. Slowly whisk in the milk until no more lumps remain. Add cream cheese and stir until melted and smooth. Remove from heat and stir in Parmesan, S&P and crushed red pepper flakes.

3. Flip each half of squash over (so you have an instant "squash bowl") and using a fork gently pull up the strands, stir in half the sauce in each squash bowl. Top with some more Parmesan and place under a broiler for 2-3 minutes until cheese is melted and golden brown. Top with fresh parsley and serve.

Enjoy!

This recipe was adapted from Christina at Farmers Market Baskets.

Thursday, January 8, 2015

Mushroom Lasagna

Here is a meat-free lasagna loaded up with mushrooms and it turned out to be another tasty meal for us. It makes a ton so you can use it for leftovers or freeze it. I tried out the no cook noodles again in this dish and I enjoyed them so much more this time around. I will say it is a major time savor (in the making of the lasagna land) to not have to boil the noodles and lay them out so they don't stick together. I will save that idea for any homemade lasagnas in my near to distant future. I had a bunch of cremini's leftover so I used only one type of mushroom in this dish but you could use various kinds for a depth of flavor.

I picked up one of those tubs of small mozzarella balls at Costco before New Years and diced them up for this dish which worked out perfectly! I found that while I was making the lasagna I had 4 noodles leftover - what! I ran out of ingredients so I didn't use them but if I make this again, I would just create another layer with them, no reason to waste them.

Mushroom Lasagna       
Serves 4-6
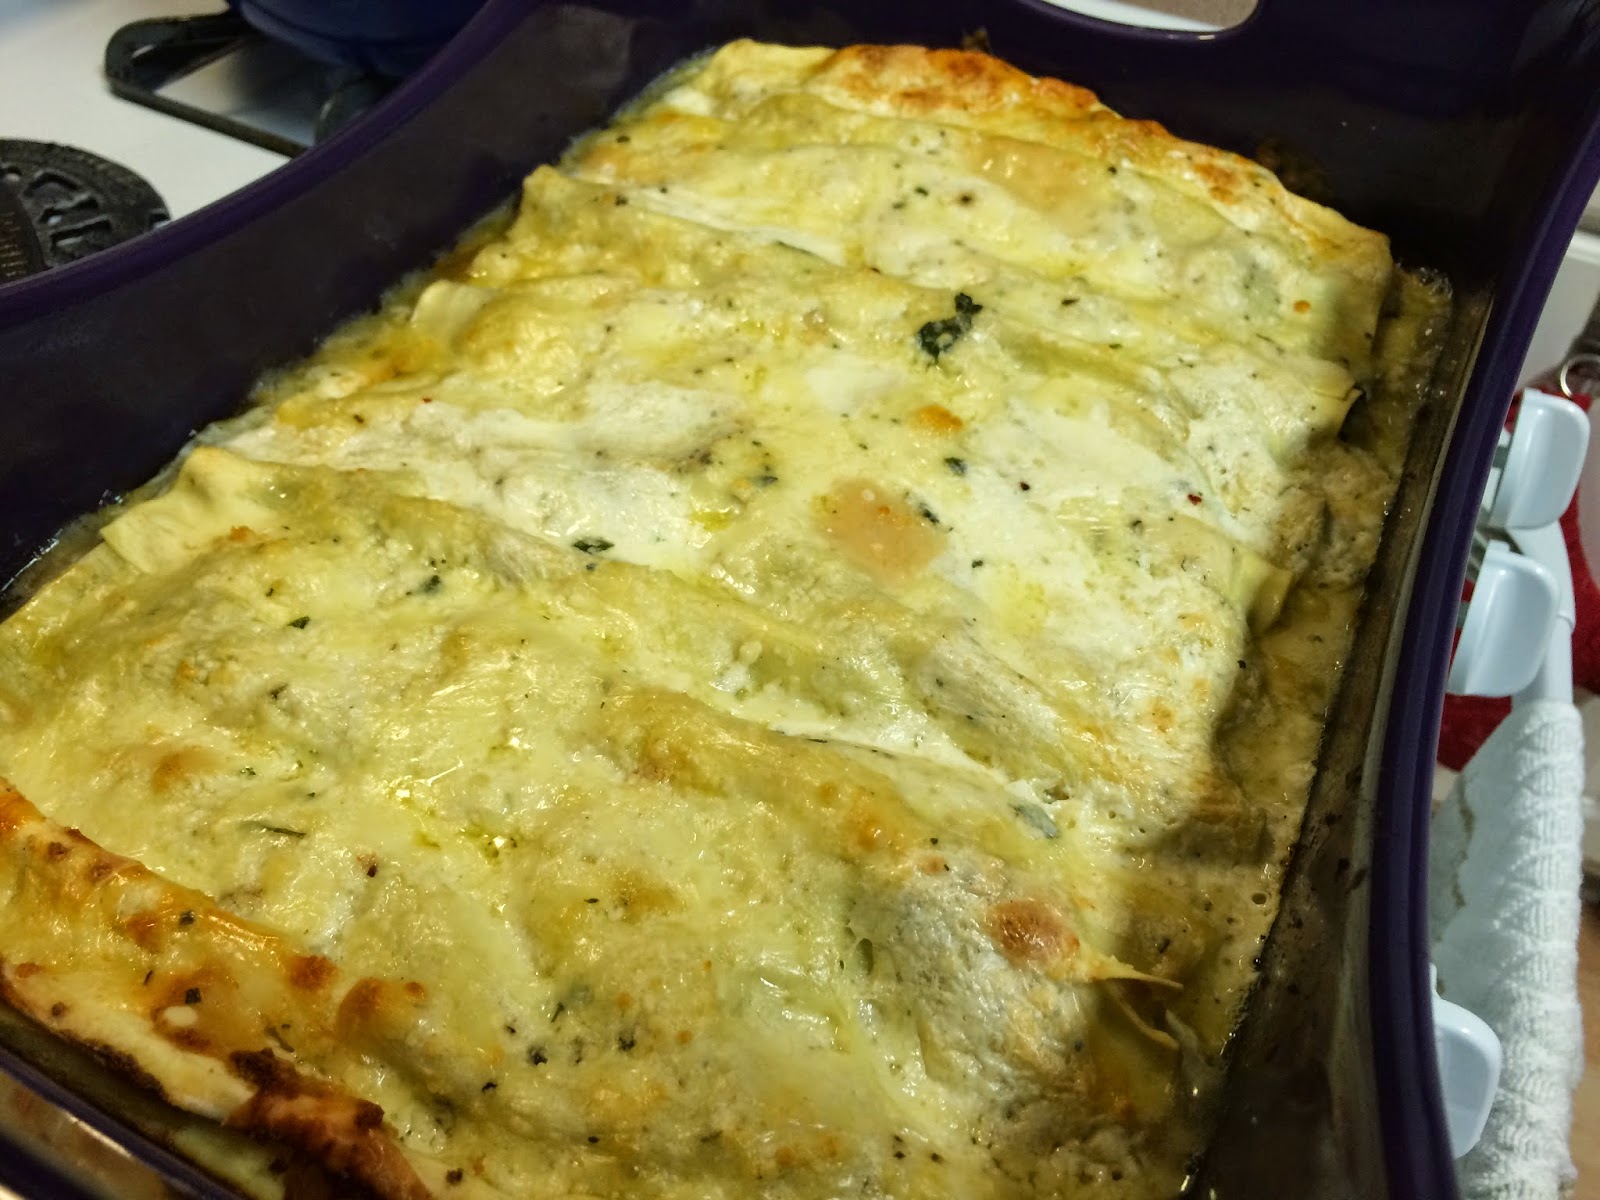
Mushroom Lasagna
ingredients

Sauce:
• 2 tbsp unsalted butter
• 2 tbsp flour
• 1 1/2 cups milk
• Freshly grated nutmeg
• Kosher Salt & Freshly Cracked Black Pepper

Lasagna:
• 2 Tbsp EVOO
• 4 Tbsp unsalted butter
• 1 1/2 - 2 lbs cremini mushrooms, sliced
• 1 tbsp dried thyme
• Salt & Pepper
• 4 cloves garlic, sliced very thinly
• 1/2 cup Marsala
• 2 1/2 - 3 cups ricotta (use fresh if you can find it), at room temperature
• 2 eggs, lightly beaten
• 1 cup Parmigiano-Reggiano cheese
• 2 cups diced fresh mozzarella
• 1 cup shredded fontina cheese
• 9 oz box Barilla no boil flat lasagna sheets

directions
1. Preheat the oven to 375ยบ. Make the sauce:  In a saucepan, melt the butter over medium heat. Add the flour and whisk for a minute or two. Whisk in the milk slowly and season with nutmeg, S&P. Cook until it thickens up a bit. Remove from heat and set aside.

2. Make the lasagna:  In a large skillet, heat the EVOO over medium heat. Melt the butter into that and add the shrooms. Let the shrooms brown completey, then season them with thyme, S&P. Add the garlic and stir for a minute until it becomes fragrant. Deglaze the pan with the Marsala. Set the shrooms aside.

3. In a bowl, combine the ricotta, eggs, 1/2 cup of the Parm, 1 cup of the mozzarella, S&P to taste. In a separate bow, mix together the remaining Parm, Mozzarella and Fontina cheeses.

4. Separate the lasagna sheets and soak them in hot water for 4-5 minutes. Grease a 9x13" baking dish/pan with nonstick spray. Make layers in the following order: 1/4 of the sauce, 4 lasagna sheets, half the ricotta mixture, half the shrooms, 1/4 of the sauce, half the mozzarella-Fontina, 4 lasagna sheets, the remaining ricotta mixture, the remaining shrooms, 1/4 of the sauce, the remaining 4 lasagna sheets, the remaining sauce and the remaining mozzarella-Fontina.

5. Cover the dish tightly with foil and place on a baking sheet. Bake for 45 minutes, uncover, and bake until browned about 10-15 minutes more. Let rest 5-10 minutes before slicing and serving.


 And I served up the lasagna with some salads and homemade Italian dressing...


Enjoy!

This recipe was adapted from Rachael Ray:  My Year in Meals.

Saturday, January 3, 2015

Noodle Bowls

I never knew that there were so many different kinds of mushrooms to cook with until I made a little visit to Whole Foods. Wowsas! I decided to go for it and try a new kind called maitake - they look like this when you get them... kinda funky, right?

Maitake Mushrooms

I've used shiitake mushrooms before and added cremini mushrooms as well to this dish. Rachael used enoki mushrooms in hers but they were sold out of those so I improvised. So all in all I made this dish with 3 different types of mushrooms as you will see below.

Maitake, Shiitake & Cremini Mushrooms

I've found that a large Dutch oven works just fine as a substitute for a Wok which I have no room for in my kitchen, nor do I really need one. The cast iron holds the heat well and distributes it evenly as well, just make sure it's really hot before you start cooking.

These noodle bowls were very tasty, they were not at all spicy because of the jalapeno mostly because I removed the seeds and veins. I would definitely reel back on the noodles next time and add more veggies. I had a 9.5 oz package and I would almost even say to only use half next time. All in all we really enjoyed this meal.


Noodle Bowls       
Serves 4-6


ingredients
• 1/4 cup vegetable or canola oil
• About 1/4 lb shiitake shrooms, stemmed and thinly sliced
• About 1/4 lb maitake (hen of the woods) shrooms, thinly sliced or chopped
• 1/4 lb cremini shrooms, stemmed and thinly sliced
• 2 carrots, peeled & cut into matchsticks
• 1 large parsnip, peeled & cut into matchsticks
• 2 medium leeks, cut into matchsticks, washed & drained well
• 2 " ginger root, peeled and grated
• 4 cloves garlic, thinly sliced
• 1 jalapeno, seeded & thinly sliced
• 9 cups chicken stock (unsalted)
• 4 Tbsp tamari
• 8 oz organic soba noodles
• Kosher Salt & Freshly Cracked Black Pepper
• Chopped cilantro and scallion greens for garnish


directions
1. In a large Dutch oven, heat the oil over high heat. Add all the mushrooms and stir. Cook until they are nutty and fragrant, about 2 minutes; add the veggie matchsticks, ginger, garlic and chile; season lightly with salt and liberally with black pepper. Stir fry 1-2 minutes.

2. Add the stock and bring to a boil. Season with tamari to taste (start with 4 Tbsp, taste and add more if needed). Add the soba noodles and cook until just tender.

3. Using tongs, fill serving bowls with noodles, mushrooms and veggies first. Then, ladle in the broth. Garnish with cilantro and scallion greens.

If you are up for it, try using chopsticks for eating the noodles/veggies and a spoon for slurping up the broth.
Enjoy!

This recipe was adapted from Rachael Ray:  My Year in Meals.

Friday, January 2, 2015

Alaskan King Crab Legs

Happy New Year! It's really crazy it's 2015 - whew where does time go? We did NYE a little bit different this year, we had apps, steamed mussels and we picked up some ginormous crab legs to eat for dinner this year. Being a MD gal and growing up eating blue crabs, I can't say that I've ever had Alaskan King Crab legs. The meat was sweet and just as delicious as I'd hoped it would be. The only downside was that they sure were hard to crack open. Why? Well, because the legs have these little spikes everywhere and it hurt our hands to break the shells (even with crackers). Those little spikes were so sharp!!!

Like most crab legs, they are already cooked so all you have to do is heat them through. I researched the best options and found that this one was a favorite so I gave it a whirl.

Alaskan King Crab Legs       
Makes 2 servings (as a main dish)
Alaskan King Crab Legs
ingredients
• 2 1/2 lbs Alaskan King Crab legs (I used 2 legs and 2 claws)
• 1-2 lemons, halved
• Plenty of Melted butter for dipping
• Old Bay Seasoning, to taste

directions
1. Preheat the oven to 350ยบ. Line a large rimmed baking sheet with foil. Place legs on the sheet and squeeze lemons over the them. Add lemon halves to the baking sheet as well. Season the legs with Old Bay to taste. Pour HOT water into the baking sheet until it covers the bottom completely. Tightly wrap the baking sheet with foil all the way around the baking sheet.

2. Bake the crab legs for 10-15 minutes or until warmed through. Serve the legs with melted butter to dip the meat into.

Enjoy!

This recipe was adapted from thehungrymouse.com

Tuesday, December 30, 2014

Deep Dish Pizza with Pepperoni, Olives, Onion and Mushrooms

It's been awhile since we made pizza this way, I like to call it deep dish style or pan pizza (remember those from back in the day at Pizza Hut?) Well, this is not heavy and greasy like those were. The dough ends up coming out light and airy for some reason and it's divine. The crust gets crunchy and golden brown but has a soft, airy center which makes for some dang good pizza if you ask me!

I already had all the ingredients in the fridge, including an open bottle of sauce so that's what inspired this meal. Like I've mentioned before Pizza dough from scratch and I have not become close pals just yet so I just pick up the dough at the local grocery store.


Deep Dish Pizza with Pepperoni, Olives, Onion and Mushrooms       
Serves 4-6

ingredients
• 1 lb prepared pizza dough
• 1 cup pizza sauce (we used some from a jar of sauce I had open to keep it simple)
• Toppings: Sliced pepperoni, Sliced red onion, Sliced olives, Sliced mushrooms, Shredded mozzarella and grated Parmesan Reggiano 
• Seasonings to taste:  Dried oregano, crushed red pepper flakes, garlic powder, kosher salt & cracked black pepper
Optional: 2 tbsp melted butter (for brushing on the crust)


directions
1. Let dough rest at room temp for 1 hour.

2. Preheat oven to 450ยบ. Lightly oil a cast iron skillet and lightly dust with some cornmeal. Roll the dough out on a lightly floured surface and form to the skillet.

3. Spoon on the sauce, add the olives and seasonings, then the cheese, pepperoni and veggies. Sprinkle a little bit more cheese on top before baking. Mix some garlic powder with the melted butter and brush along the crusts edge - oh yeah baby!

4. Bake for 20 minutes until crust has risen and is golden brown.

Serve up 2 slices per person and a big ole salad on the side, it really is a wonderful meal!!!

Pizza with salad, perfect meal!
Enjoy!

This recipe was created by Us.

Monday, December 29, 2014

Split Pea Soup

Oh what to do with all the ham leftovers from Christmas?!?! I say make soup, omelets, sandwiches (I like to call 'em Sammies), breakfast burritos... well, it seems that there are many possibilities. Well, here is one: Split Pea soup.

Well, here is a healthier take from one of my Cook This, Not That cookbooks. This version is definitely not the thick, creamy version I am used to, must be why it's healthier? I added some diced ham in addition to the ham bone at the end of the cooking process. Since you are using ham, wait to salt the soup until the end of the cooking process to ensure the dish doesn't end up being too salty.

This soup has delicious flavor and is great but part of me still loves the hearty, thicker version but this is certainly a recipe I would share and try again.

Split Pea Soup       
Serves 6
Split Pea Soup

ingredients
• 1 tsp EVOO
• 2 ribs celery, diced
• 1 small onion, diced
• 2 carrots, diced
• 2 cloves garlic, minced
• 10 cups no salt vegetable or chicken stock
• 2 medium red potatoes, diced (leave the skins on!)
• 1 smoked ham hock or bone from leftover ham
• 1-2 cups chopped ham (optional)
• 1 cup split peas
• 2 bay leaves
• Your favorite hot sauce, to taste
• Kosher Salt & Freshly Cracked Black Pepper, to taste

directions
1.  Heat the EVOO in a large cast iron dutch oven over medium heat. Add the celery, onion, carrots & garlic and saute for 5 minutes, stirring occasionally. Add the stock, potatoes, split peas and bay leaves. Stir and then add the ham bone/hock. Bring to a boil, reduce the heat to a simmer and cover.

2. Cook for 40 minutes until the peas have softened and the soup is thick. If you like it thinner, add more stock until you reach the desired consistency.

3. Remove the ham bone, shred any meat clinging to the bone, add the diced ham (if using). Discard the bay leaf. Add the meat to the soup, season with S&P and some hot sauce to taste. Cook another 10 minutes until the meat is warmed through.

Serve with crusty bread if desired or just on it's own.

Enjoy!

This recipe was adapted from Cook This Not That, Skinny Comfort Foods.

Saturday, December 27, 2014

Doggie Gingerbread Biscuits

I haven't ever made dog biscuits from scratch but decided to give it a whirl for the holidays this year. I discovered that they are much easier than making people cookies and I'm wondering why I haven't done this more often. Another added bonus is that I already had the ingredients on hand so talk about saving some mula on dog treats! My sweet girl seems to love these, I did notice that they soften up a bit if you store them in a sealed container but she didn't seem to mind at all.

I doubled the recipe so I could give them as gifts as well. Here is how I made them...

Gingerbread Biscuits for your four legged babies...      
Makes 24

Homemade Dog Treats

ingredients
• 3 cups whole wheat flour
• 1/2 tsp ground ginger
• 1 tsp ground cinnamon
• 1/4 cup plus 1 tbsp vegetable oil
• 1/2 cup molasses

directions
1. Preheat the oven to 325ยบ. Lightly grease a cookie sheet. In a large bowl, sift together the flour, ginger and cinnamon. Mix in the oil, molasses and 1/2 cup water; let rest for 15 minutes.

2. On a lightly floured surface (I had to use a lot of flour to keep it from sticking to both the counter and the rolling pin), roll out the dough about 1/4" thick. Using cookie cutters, cut out the shapes and transfer to the baking sheet. Bake until firm, about 20 minutes.

Every pet is different, so check with your vet to see if this recipe is suitable for your dog. 

Enjoy!

This recipe was adapted from Everyday with Rachael Ray.

Friday, December 26, 2014

Mussels in White Wine

My brother made these delicious mussels for our family as an appetizer on Christmas Day. It was really fun for me to cook with him in the kitchen yesterday. We have made these in the past but they were probably the best we've had. He seared the bread in a hot skillet with some butter until crisp so we could mop up the delicious sauce at the bottom of the dish. The mussels were so tender and flavorful, this recipe is definitely a keeper!

A tasty idea for any leftover sauce (that is, if you have any) is to toss it with some cooked pasta or noodles of some kind.

Mussels in White Wine      
Serves 4-6 (appetizer)
Mussels in White wine
ingredients
• 3 lbs mussels
• 1/3 cup flour
• 2 tbsp unsalted butter
• 2 tbsp EVOO
• 5-7 shallots, minced
• 6 cloves garlic, minced
• 4 oz chopped canned plum tomatoes (1/2 cup)
• 1/2 tsp saffron threads (a pinch)
• 1/3 cup fresh parsley, chopped
• 1 tbsp fresh thyme leaves
• 1 cup white wine (we used Clos du bois) Chardonnay
• 2 tsp Kosher Salt & 1 tsp Black Pepper

directions
1. Clean the mussels by putting them in a large bowl filled with 2 quarts of cold water and the flour. Whisk this mixture together, then gently pour the mussels in. Soak for 30 minutes. Drain and remove the "beard" from each with your fingers (this was already done by the store, so we didn't have to do this step). Rinse the mussels thoroughly with cold water. Discard any mussels whose shells aren't tightly shut.

2. In a large non-aluminum stockpot, heat the butter and EVOO over medium heat. Add the shallots and cook for 5 minutes, then add the garlic and cook for 3 more minutes, stirring occasionally. Add the tomatoes, saffron, parsley, thyme, wine, S&P and bring to a boil.

3. Add the mussels, stir well, then cover the pot. Now, cook over medium for 10 minutes until all the mussels are open, make sure to discard any that do not open. With the lid on, shake the pot once or twice to be sure the mussels don't burn on the bottom of the pot! That would be terrible! Gently pour the mussels into a  large bowl and serve with a buttered, warm baguette.

Note: A quick trick for amazing garlic bread, is to rub a garlic clove over the sliced sides of a baguette, brush on some melted butter and warm in the oven or on a hot skillet.

Enjoy!

This recipe was adapted from Ina Garten.

Holiday Sweet Treats: Peppermint Bark, Cookies & Cream Truffles and Walnut Fudge


We decided to make some holiday candy for gifts this year and it turned out to be pretty fun little adventure. We snacked and had holiday music playing in the background, it was pretty fun! All 3 of these treats turned out to be so delicious and fairly easy to put together. Honestly, it was hard not to eat a ton of each one while we were making them. I pulled all the recipes from an allrecipes holiday magazine I got recently and tweeked some of them just a bit. Here is how we made them...

Peppermint Bark        
Peppermint Bark

ingredients
•20 peppermint candies
• 12 oz semisweet chocolate chips
• 4 Tbsp shortening
• 3/4 tsp peppermint extract
• 12 oz white chocolate chips

directions
1. Line lightly greased (I used baking spray) parchment paper on a baking sheet. Unwrap the candies and put in a ziploc bag. Using a mallet, finely crush the candies. (Note: don't do this until you are ready to use the candies so they don't stick together too much).

2. Put semisweet chocolate and 2 Tbsp shortening in a glass bowl over a pot of barely simmering water. Heat, stirring with a rubber spatula until melted. Stir in half the peppermint extract. Pour into the prepared baking sheet and spread evenly. Sprinkle half the crushed candies over the top. Set in freezer for 1 hour until set.

3. Put white chocolate and 2 Tbsp shortening in a glass bowl over a pot of barely simmering water. Heat, stirring with a rubber spatula until melted. Stir in the rest of the peppermint extract. Pour on top of the hardened chocolate and spread evenly. Sprinkle the res of the crushed candies over the top. Set in freezer for 1 hour until set.

Once hardened using a butter knife on a cutting board, break up the bark into small pieces. Layer between parchment paper (to prevent sticking) and in an airtight container up to 1 month.


Cookies & Cream Truffles        
Makes 3 1/2 dozen


Cookies & Cream Truffles
ingredients
• 14. 3 oz pkg of Oreo cookies
• 8 oz package cream cheese, softened
• 16 oz semisweet chocolate chips
• 1 Tbsp shortening

directions
1. Pulse cookies in a food processor until they form fine crumbs. Set aside 1/2 cup crumbs in a small bowl. Line a baking sheet with wax paper. Add cream cheese to remaining crumbs in the food processor. Plus until they are well combined. With dampened hands, shape the mixture into walnut size balls and set on the baking sheet.

2. Melt the chocolate and shortening in a glass bowl over a pot of barely simmering water. Stir with a rubber spatula until melted. Remove from heat.

3. Dip balls in chocolate using 2 forks to turn and coat. Lift out with the forks, allowing the excess chocolate to drip off. Transfer to the baking sheet and sprinkle the reserved cookie crumbs. Chill for about 1 hour until firm.

Transfer to an airtight container and store in fridge up to 2 weeks.


Walnut Fudge        
Makes about 2 pounds


Walnut Fudge
ingredients
• 18 oz semisweet chocolate chips
• 14 oz can sweetened condensed milk
• 1/4 cup butter
• 1 cup chopped walnuts

directions
1. Line an 8 x 8 baking dish with greased parchment paper (layer 2 pieces over top on another in crisscross pattern so it is easier to lift the fudge out and cut).
2. Put chocolate, milk and butter in a large microwaveable bowl. Heat on medium, stirring once or twice until melted (3-5 minutes). Stir in the nuts. 
3. Pour into the prepared dish. Chill until set about 2 hours. Cut into 1 x 2" piece and store in an airtight container up to 1 month.

Enjoy!

This recipe was adapted from allrecipes.

Cherry Chili Glazed Ham

This is maybe the 3rd time I have made this for the holidays and it's always a hit... the ham is juicy and the glaze is sweet with hints of spice. I made this for Christmas Eve dinner with Q's family.

I just love ham leftovers, so they are a must and I always go bigger than what we will eat the night we serve it. This leftover ham freezes really well too, we just slice it up and store in freezer bags. It's great for soups, sandwiches and breakfast burritos.

In general, I cooked the ham 20 minutes per pound so the ingredients below are for a 13.29 lb ham.


Cherry Chili Glazed Ham       
Serves 12-15
Cherry Chili Glazed Ham

ingredients
• 13.29 lb smoked, semi-boneless ham
• 1 cup cherry preserves
• 1/2 cup brown sugar
• 6 tbsp whole grain mustard
• 1 tbsp whole coriander seeds, lightly crushed
• 4 tsp chili powder
• 1/2 tsp ground ginger
• Pinch cayenne
• Pinch of Kosher Salt & 1 tsp Freshly Cracked Black Pepper

directions
1. Let the ham sit at room temp for at least an hour. Position the rack in the lower third of the oven and preheat to 325ยบ. Using a sharp knife, score the top and sides of the ham lengthwise, making cuts about 1/4" deep and 1" apart. Rotate the ham 90ยบ and repeat to make crisscross cuts.

2. Transfer the ham to a roasting pan lined with foil. Roast, rotating the pan once, until the ham is evenly browned and internal temp reads 125ยบ in the thickest part of the ham. (Make sure the thermometer is not touching bone). Remove from oven.

3. Meanwhile, combine the next 8 ingredients in a small saucepan. Bring to a simmer, stirring until all of the sugar is dissolved. Remove from heat, set aside until ready to glaze. Note: I made the glaze the day beforehand and stored in airtight container in the fridge.

4. When the ham reaches 130ยบ internal temp, increase the oven to 400ยบ. Brush the top and sides of ham with the glaze and return ham to the oven. Roast for another 12-15 minutes until the surface is dark brown and sizzling. Remove from oven and add remaining glaze. Let rest at least 30 minutes before slicing and serving.

Enjoy!

This recipe was adapted from Everyday with Rachael Ray Magazine.

Turkey Sausage Breakfast

We got to enjoy this tasty casserole on Christmas morning. I prepped all the ingredients so it would be easier to put together since it does have to bake for an hour. It is a healthier take on the usual sausage and hash browns breakfast because of the turkey sausage and the egg whites. I added a red bell pepper and green chiles to add not only more color but flavor as well. I also chose to brown the hash browns prior to mixing them up with the other ingredients which turned out to be a great choice.

For leftovers, just roll them up in tortillas with a little bit of hot sauce and sliced avocado... yum!


Turkey Sausage Breakfast       
Serves 8
Turkey Sausage Breakfast Casserole

ingredients
• 1 lb ground turkey breakfast sausage
• 8 large egg whites, lightly beaten
• 4 green onions, finely chopped
• 1/2 cup whole milk
• 4 oz shredded cheddar cheese
• 4 oz chopped green chiles
• 1 red bell pepper, seeded and chopped
• Kosher Salt & Freshly Cracked Black Pepper

directions
1. Preheat the oven to 350ยบ. Brown sausage in a cast iron skillet over medium heat until browned and cooked through. Remove and set aside on a plate. Add some oil to the skillet and the hash browns, salt, pepper & green chiles. Cook until potatoes are slightly browned. Remove from heat.

2. In a large bowl, mix all the ingredients together until well blended. Pour into a buttered 9 x 13 baking dish.

3. Bake for 1 hour, let cool slightly and serve.

Enjoy!

This recipe was adapted from allrecipes.

Sunday, December 21, 2014

Peanut Butter Blossoms

We had a great time yesterday baking cookies with the girls for Christmas, I hope it becomes a new tradition. We made both sugar cookies and these Peanut Butter Blossoms. The girls had a blast helping measure and decorating these sweet treats too. The Peanut Butter Blossoms were fairly easy to put together and they taste great too. Here is how we made them... I didn't count exactly how many cookies it made but there was plenty for the 3 of us to take enough home to munch on.

Peanut Butter Blossoms       
Makes about 60 cookies
Peanut Butter Blossoms

ingredients
• 1 cup shortening
• 1 cup peanut butter
• 1 cup packed brown sugar
• 1 cup sugar
• 2 eggs
• 1/4 cup milk
• 2 tsp vanilla extract
• 3 1/2 cups all purpose flour
• 2 tsp baking soda
• 1 tsp salt
• 1/2 cup sugar for decorating
• candy kisses, unwrapped

directions
1. Preheat the oven to 375ยบ. Line baking sheets with parchment paper.

2. In a large bowl, cream the shortening, peanut butter, brown sugar and 1 cup white sugar until smooth. Add the eggs one at a time, beating until fully incorporated. Mix in milk and vanilla. Set aside.

3. In another bowl, whisk flour, baking soda and salt together. Gradually pour this mixture into the peanut butter mixture until well blended.

4. Shape tablespoons of dough into balls and roll in remaining white sugar. Place cookies 2 inches apart on baking sheets.

5. Bake each batch for 10-12 minutes until golden. Remove from oven and immediately press a chocolate kiss into each cookie. Let them cool completely before storing. Note: if you need to speed the cooling process, place baking sheets in the fridge and they will set rather quickly.

Enjoy!

This recipe was adapted from My Baking Addiction.

Saturday, December 20, 2014

Chili Blanco

This recipe for white chili is definitely a keeper! I was a bit concerned with the amount of peppers going in that it would be too spicy for me, but it was not. You never can tell how spicy your peppers will be so if you are concerned about heat I would dial back the peppers or sub in less spicy peppers. I am fortunate enough to have authentic green Chile in our freezer straight from Hatch, NM so that definitely adds extra flavor to this dish!

I also put less meat than the original recipe called for and added an extra can of beans in its place. In addition, I also replaced canned hominy with corn in this dish. We don't particularly care for hominy so when a recipe calls for it, I sub in either potatoes or corn. The sweet, crunchy kernels were an excellent addition in my mind.

So here is how I made it...

Chili Blanco       
Serves 10
Chili Blanco
ingredients
• 1 Tbsp Canola oil
• 11 oz ground turkey
• 2 onions, diced
• 6 cloves garlic, minced
• 5 1/4 cups low sodium chicken broth
• 3 15-oz cans Cannellini beans, rinsed & drained
• 12 oz bag frozen corn
• 4 green chiles, roasted, peeled, seeded & chopped (or 2  4-oz cans diced green chiles)
• 1 large jalapeno, seeded & minced
• 1 medium poblano, seeded & diced
• 1 lime juiced
• 2 Tbsp ground cumin
• Handful of cilantro leaves roughly torn
• Kosher Salt & Freshly Cracked Black Pepper

directions
1. Heat a dutch oven over medium heat. Once pot is hot, add the oil and the turkey, onions & garlic. Season with some S&P and cook until turkey is browned and cooked through. Drain off fat.

2. Add the broth, beans, peppers, lime juice, cumin, salt and pepper to taste. Bring to a boil, reduce heat and cover. Simmer for 40 minutes, stirring occasionally. During the last 10 minutes of cooking add the frozen corn.

3. Remove from heat and stir in the cilantro.

Serve with warm tortillas/cornbread on the side. We also added some diced avocado and I stirred in a dollop of sour cream in mine.

Enjoy!

This recipe was adapted from BHG Soups & Stews